


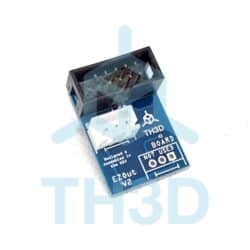
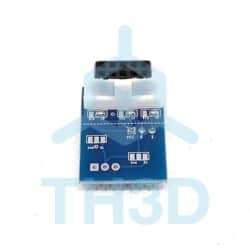
TH3D High Amp MOSFET V3 – Heated Bed or Hotend – 12V/24V Printers
$13.99
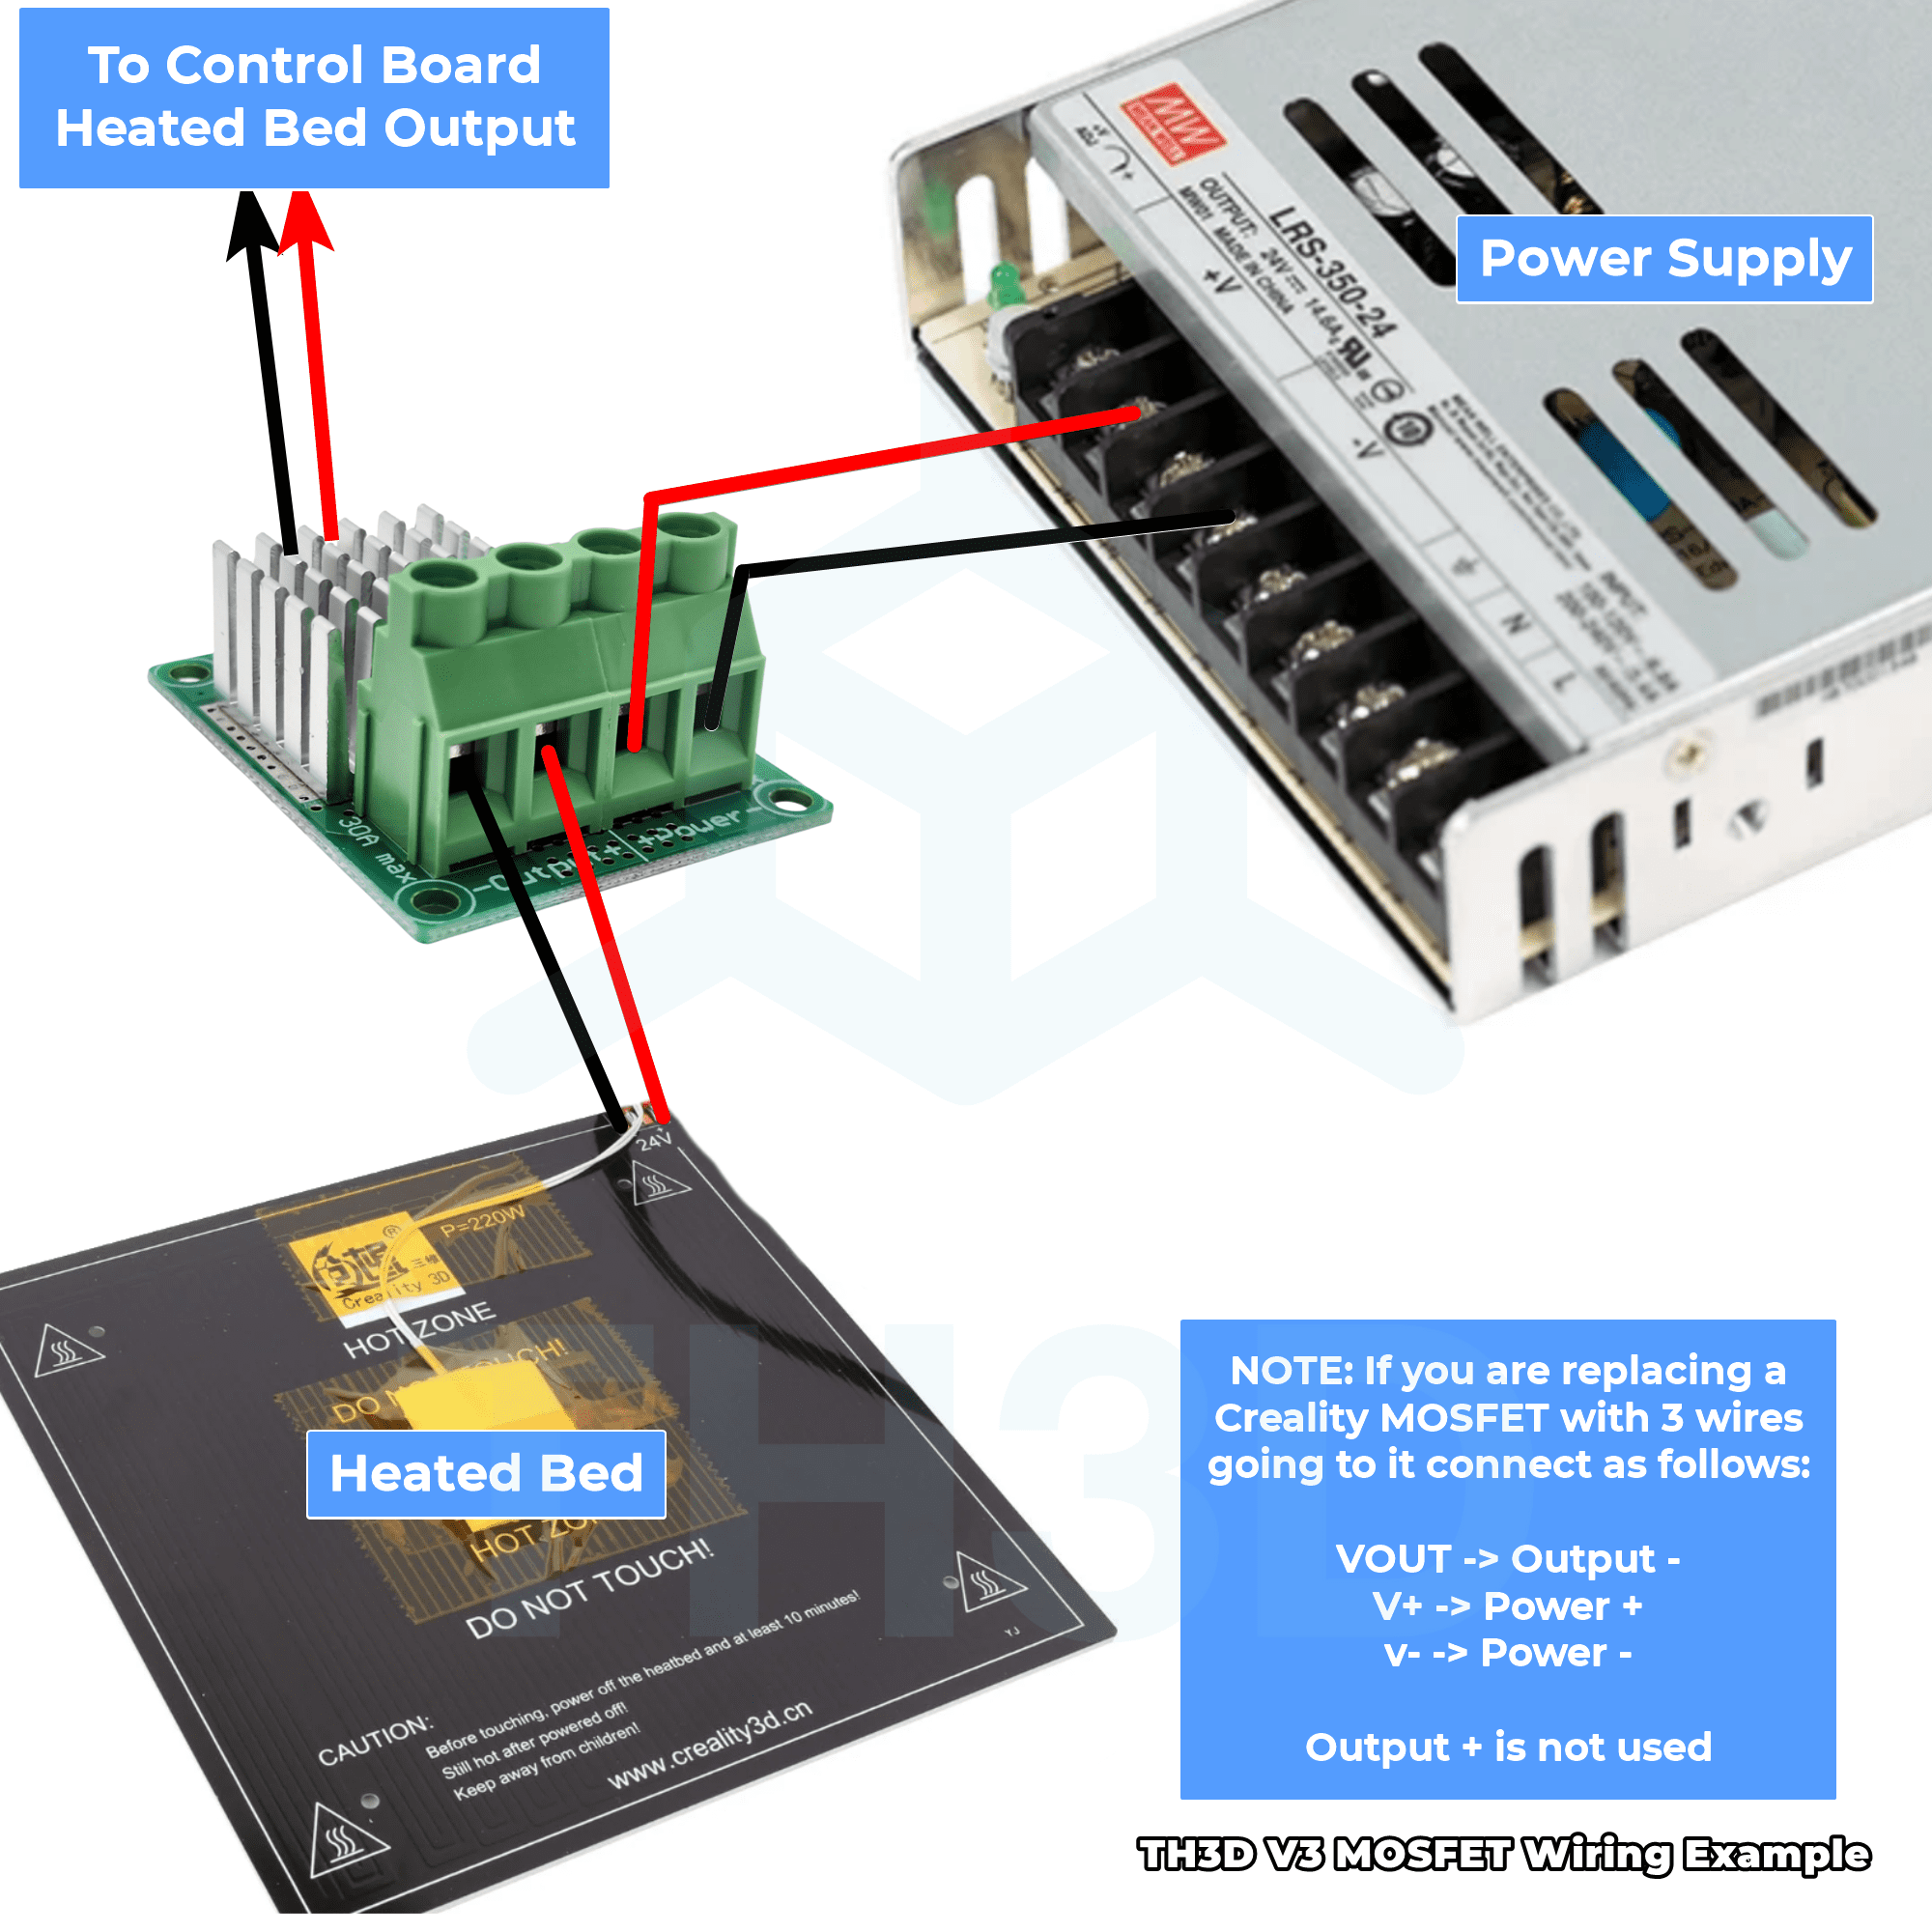
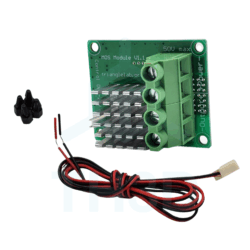
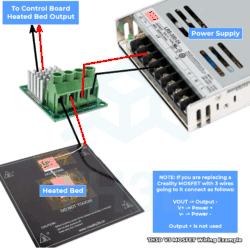
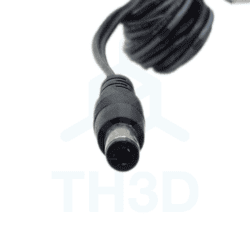
Large Screw Terminals, Includes 12″ Control Wire – Connection from MOSFET to Printer Board Wiring Diagram & Compatible STL files for mounting included.
Only 23 left in stock
Usually ready in 1 hour or less - See how it works | View on Google Maps
Description
Added Bonus EXCLUSIVE to TH3D Customers
Includes a free 3 month or $7 off 1 year of our Unified 2 Firmware package. Coupon will be emailed to you after checkout and will work on ANY Unified 2 Firmware Package in our store here: https://www.th3dstudio.com/product-category/unified-2-firmware/
Coupon code expires 30 days from the date it is issued.
Why do you want this upgrade?
Upgrade your heated bed to heat quicker* (if you have a stock external MOSFET or none at all) with our high amp MOSFET board. You can use this with heated beds or hotends (if you are wanting maximum protection). The main reason to use an external MOSFET like this one is to remove the high amp load from your bed off of the control board and put it onto this MOSFET module. Compatible with PID regulation (used in our firmware). Works with any printer that runs on 12-24V on the board and heated bed. Also works with ESP, Arduino, and Raspberry Pi boards.
Technical Information
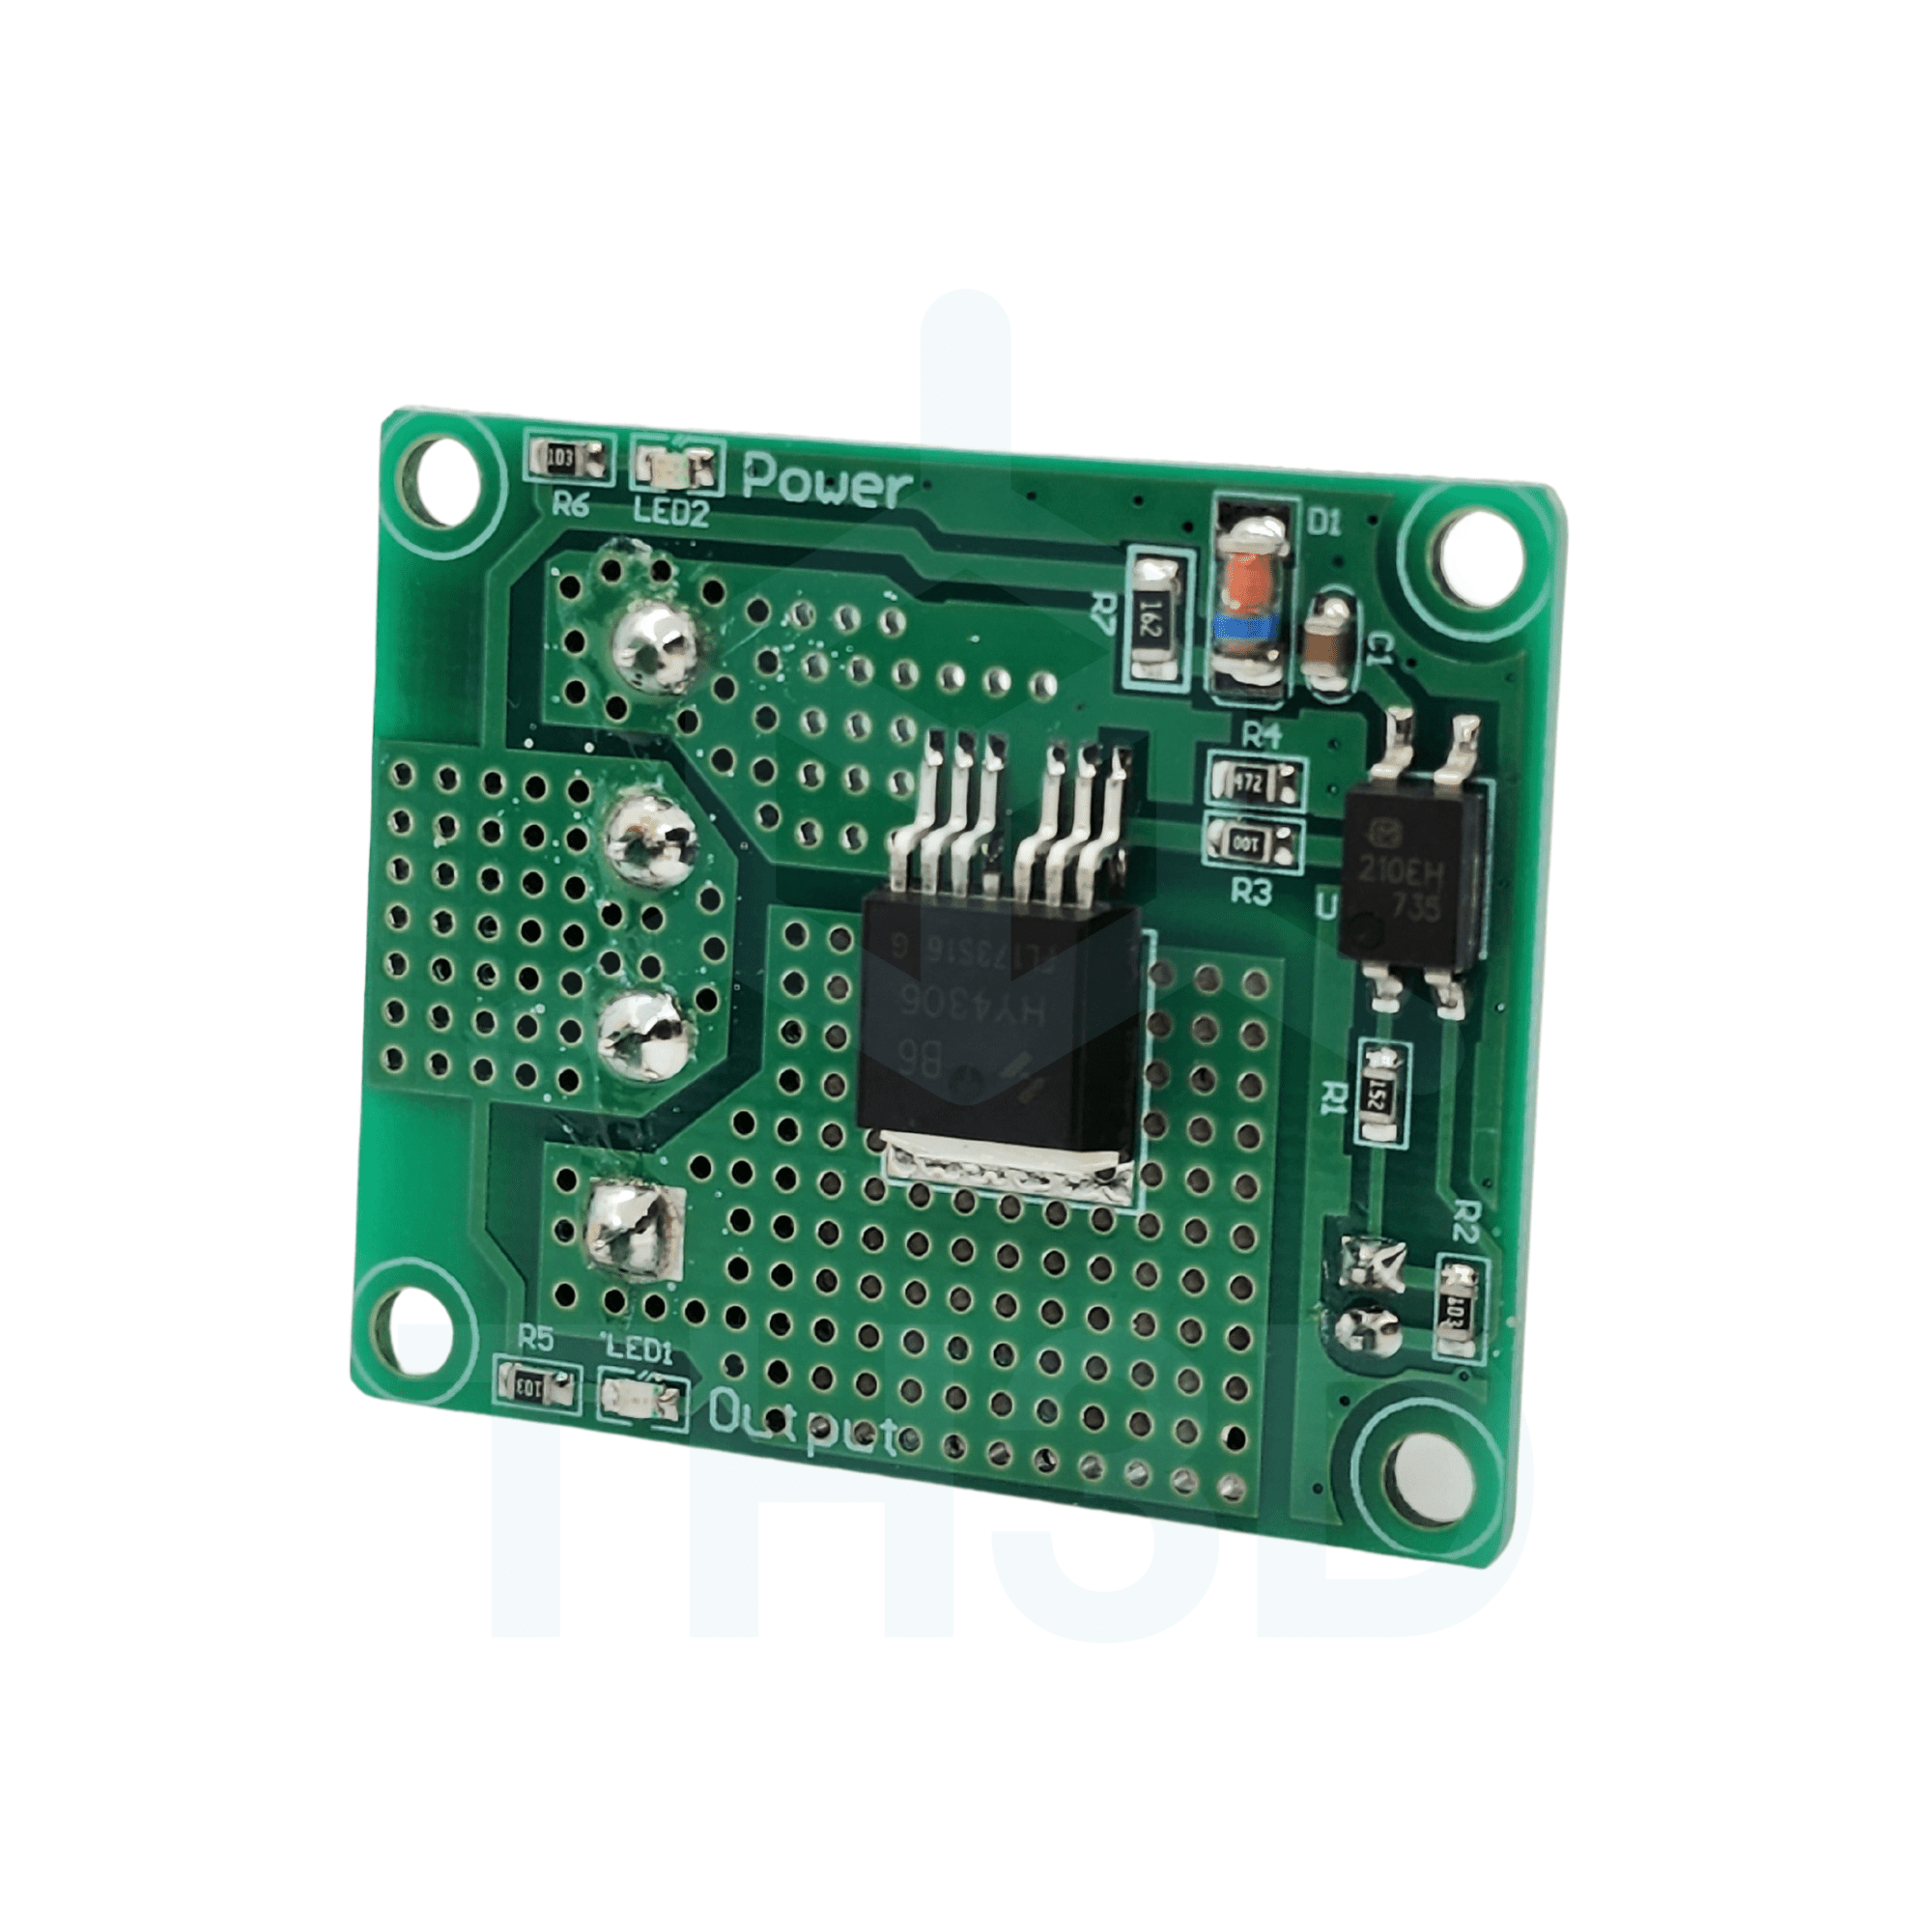
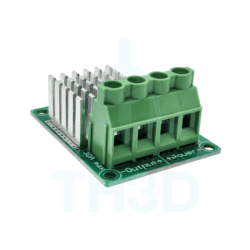
Rated up to 30A @ 3V-24V DC with fan cooling. 20A max load with no fan. Large Screw Terminals for easy wire connection and works great with crimp ferrules. Includes 12″ Control Wire – Connection from MOSFET to Printer Board
NOTE: Before installing the MOSFET make sure the heatsink is firmly adhered to the PCB. They can sometimes get knocked off during shipping. Just press on the heatsink and it will bond to the PCB.
*Quicker heat-up times are based on testing in-house and customer feedback when using basic control boards or stock external MOSFETs. Not all printers will see quicker heat-up times. Other factors such as using PID or Bang-Bang regulation will also affect heating times on stock and our MOSFETs.
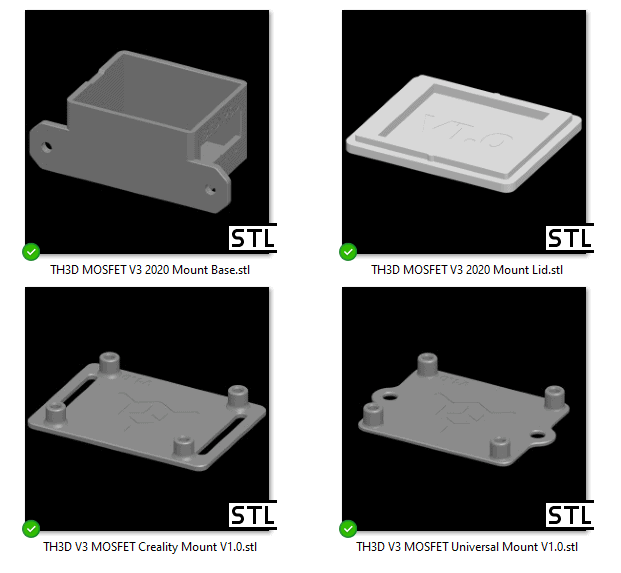
Installation, Wiring Diagram, & STLs for Mounting
STL files to mount to your printer (Universal, DIN Rail mounts, and Creality Specific options are available) are included with purchase. All mounts use M3 screws to attach the MOSFET to the part (screws not included).
DIY Pricing: Support Not Included
To keep our part prices as low as possible, this item does not include technical support.
Need help installing or troubleshooting?
We offer paid Priority Email Support and Live Expert Consultations starting at just $35.
Part Fitment/Installation
This is a universal 3D printer part. That means it will work on almost any 3D printer (check your printer voltage and part voltage) with the correct mount for your specific machine. Thingiverse is a wonderful place to locate mounts and we also have printed parts in our shop for some universal parts.
It is up to you to determine and select a mount for your specific printer model (or design one) to install this part on your machine and wire it up to your machine (if applicable). You are welcome to Contact Us for recommendations for your particular printer model for mounting options that are available online if searching yourself does not yield any results.
Reviews (15)
15 reviews for TH3D High Amp MOSFET V3 – Heated Bed or Hotend – 12V/24V Printers
Add a review
Additional information
| Weight | 5 oz |
|---|---|
| Dimensions | 4 × 4 × 4 in |
| Made In | 🇨🇳 China |
| Warranty Length | 6 Months |


LUKE W HATFIELD (verified owner) –
This is the Third one I’ve purchased for Creality printers where the SSR failed, two cr10s pro and and Ender 5 plus
Kelly Bermond (verified owner) –
Works great. Thanks
GARY NETTENSTROM (verified owner) –
The MOSFET I ordered works as described. I only have one question. What does the red flashing light indicate?